Configuration
Configuration is available in the Add-ons section in Jira Administration.
Deletion jobs
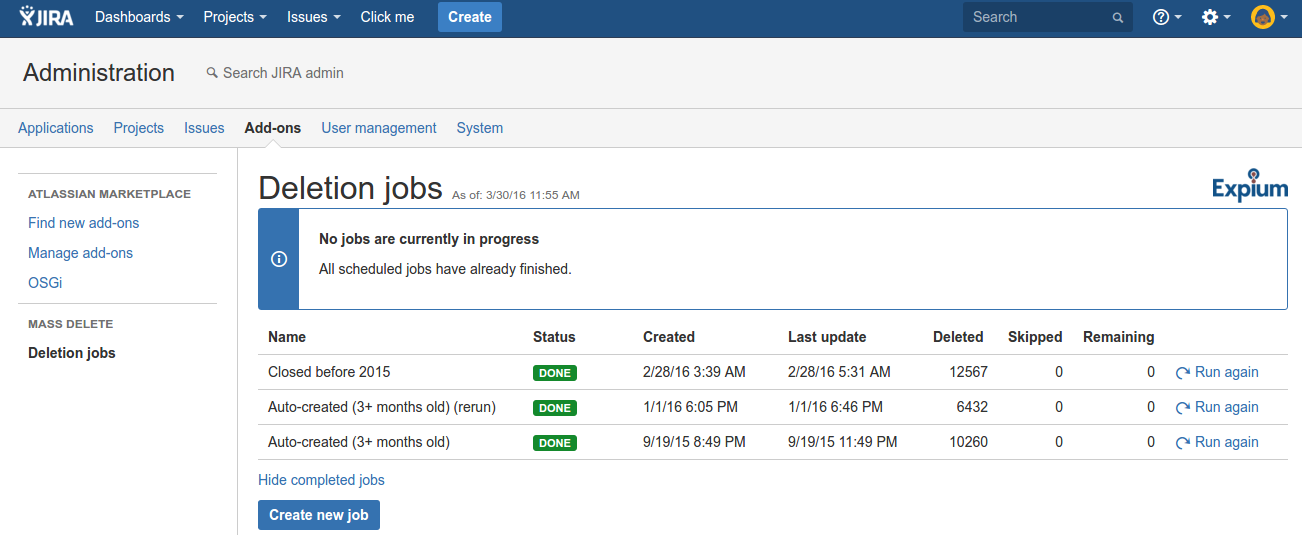
The Deletion jobs page shows deletion job(s) along with their status. It is also the starting page used to create new jobs.

Only one job can be running at a time. When a job is currently in progress, its status is displayed in the same table.

The page includes the following columns:
Name
Status - one of:
In progress
Done (completed successfully)
Stopped (user terminated the job while it was running)
Failed (job terminated due to an unexpected error)
Created date and time
Last update - when an issue was last deleted
Deleted count
Skipped count - an issue may be skipped if the add-on receives an error, for example because it is not authorized to delete it or because the issue no longer exists
Remaining count
An in-progress job may be stopped using the Stop action. Completed or stopped jobs can be executed again with the Run again action. Before a job is re-executed, it will be possible to rename it, adjust the query and review the currently matching issues.
Creating jobs
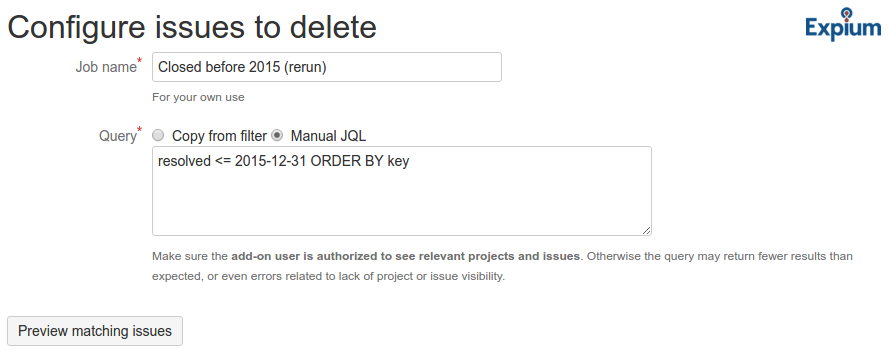
Click the Create new job or use the Run again action in Deletion jobs screen to create a new job. The configuration page is shown below.

Each job is given a Job name. This name will be used as a label on job status page.
The Query determines what Jira issues will be deleted by the job. You can select an existing favorite filter, or enter the Jira Query Language (JQL) query directly. Tip: to obtain a ready-to-use query without creating a favorite filter, you can use the Jira issue search and click the "Advanced" link to get the corresponding JQL clause.
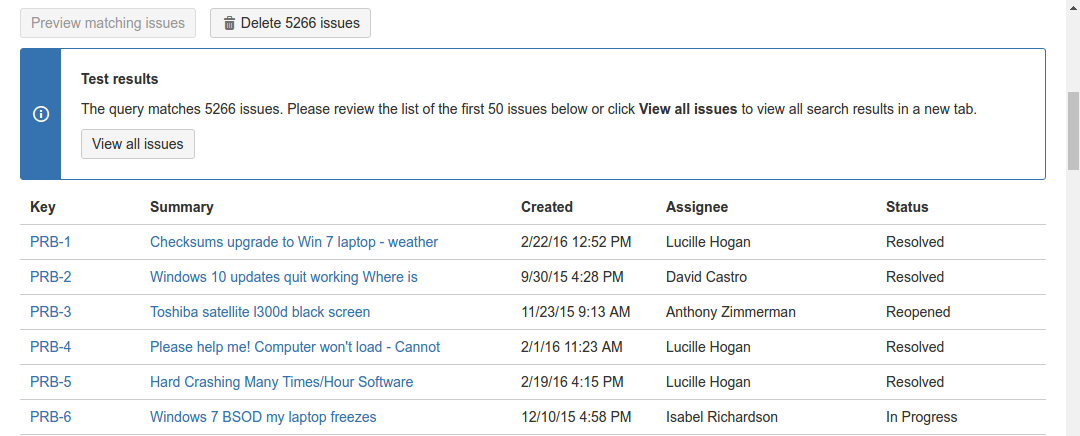
Once job name and query are in place, click Preview matching issues to review Jira issues matching the query.

The add-on will display a quick preview with a small sample. It also provides a View all issues button, opening Jira search with the same query in a new tab. Use it to review more issues and have access to column selection. If you adjust the query in Jira issue search, remember to copy it back to job configuration!
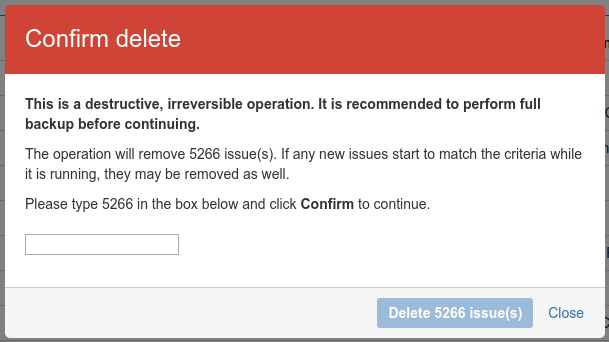
Next, click the Delete issues button. Before the job starts, it needs confirmation by typing in the number of issues currently matching the query.

Once the job is saved, you will be navigated back to the job status page.
